Guide
Learn how to use each PA Tools feature.
Complete your content work quickly and easily.
GIF 효과 넣기 — 상세 가이드
내 이미지에 반짝이, 불꽃, 글리치 등 움직이는 효과를 넣어 GIF / WebP / MP4로 만들 수 있어요.
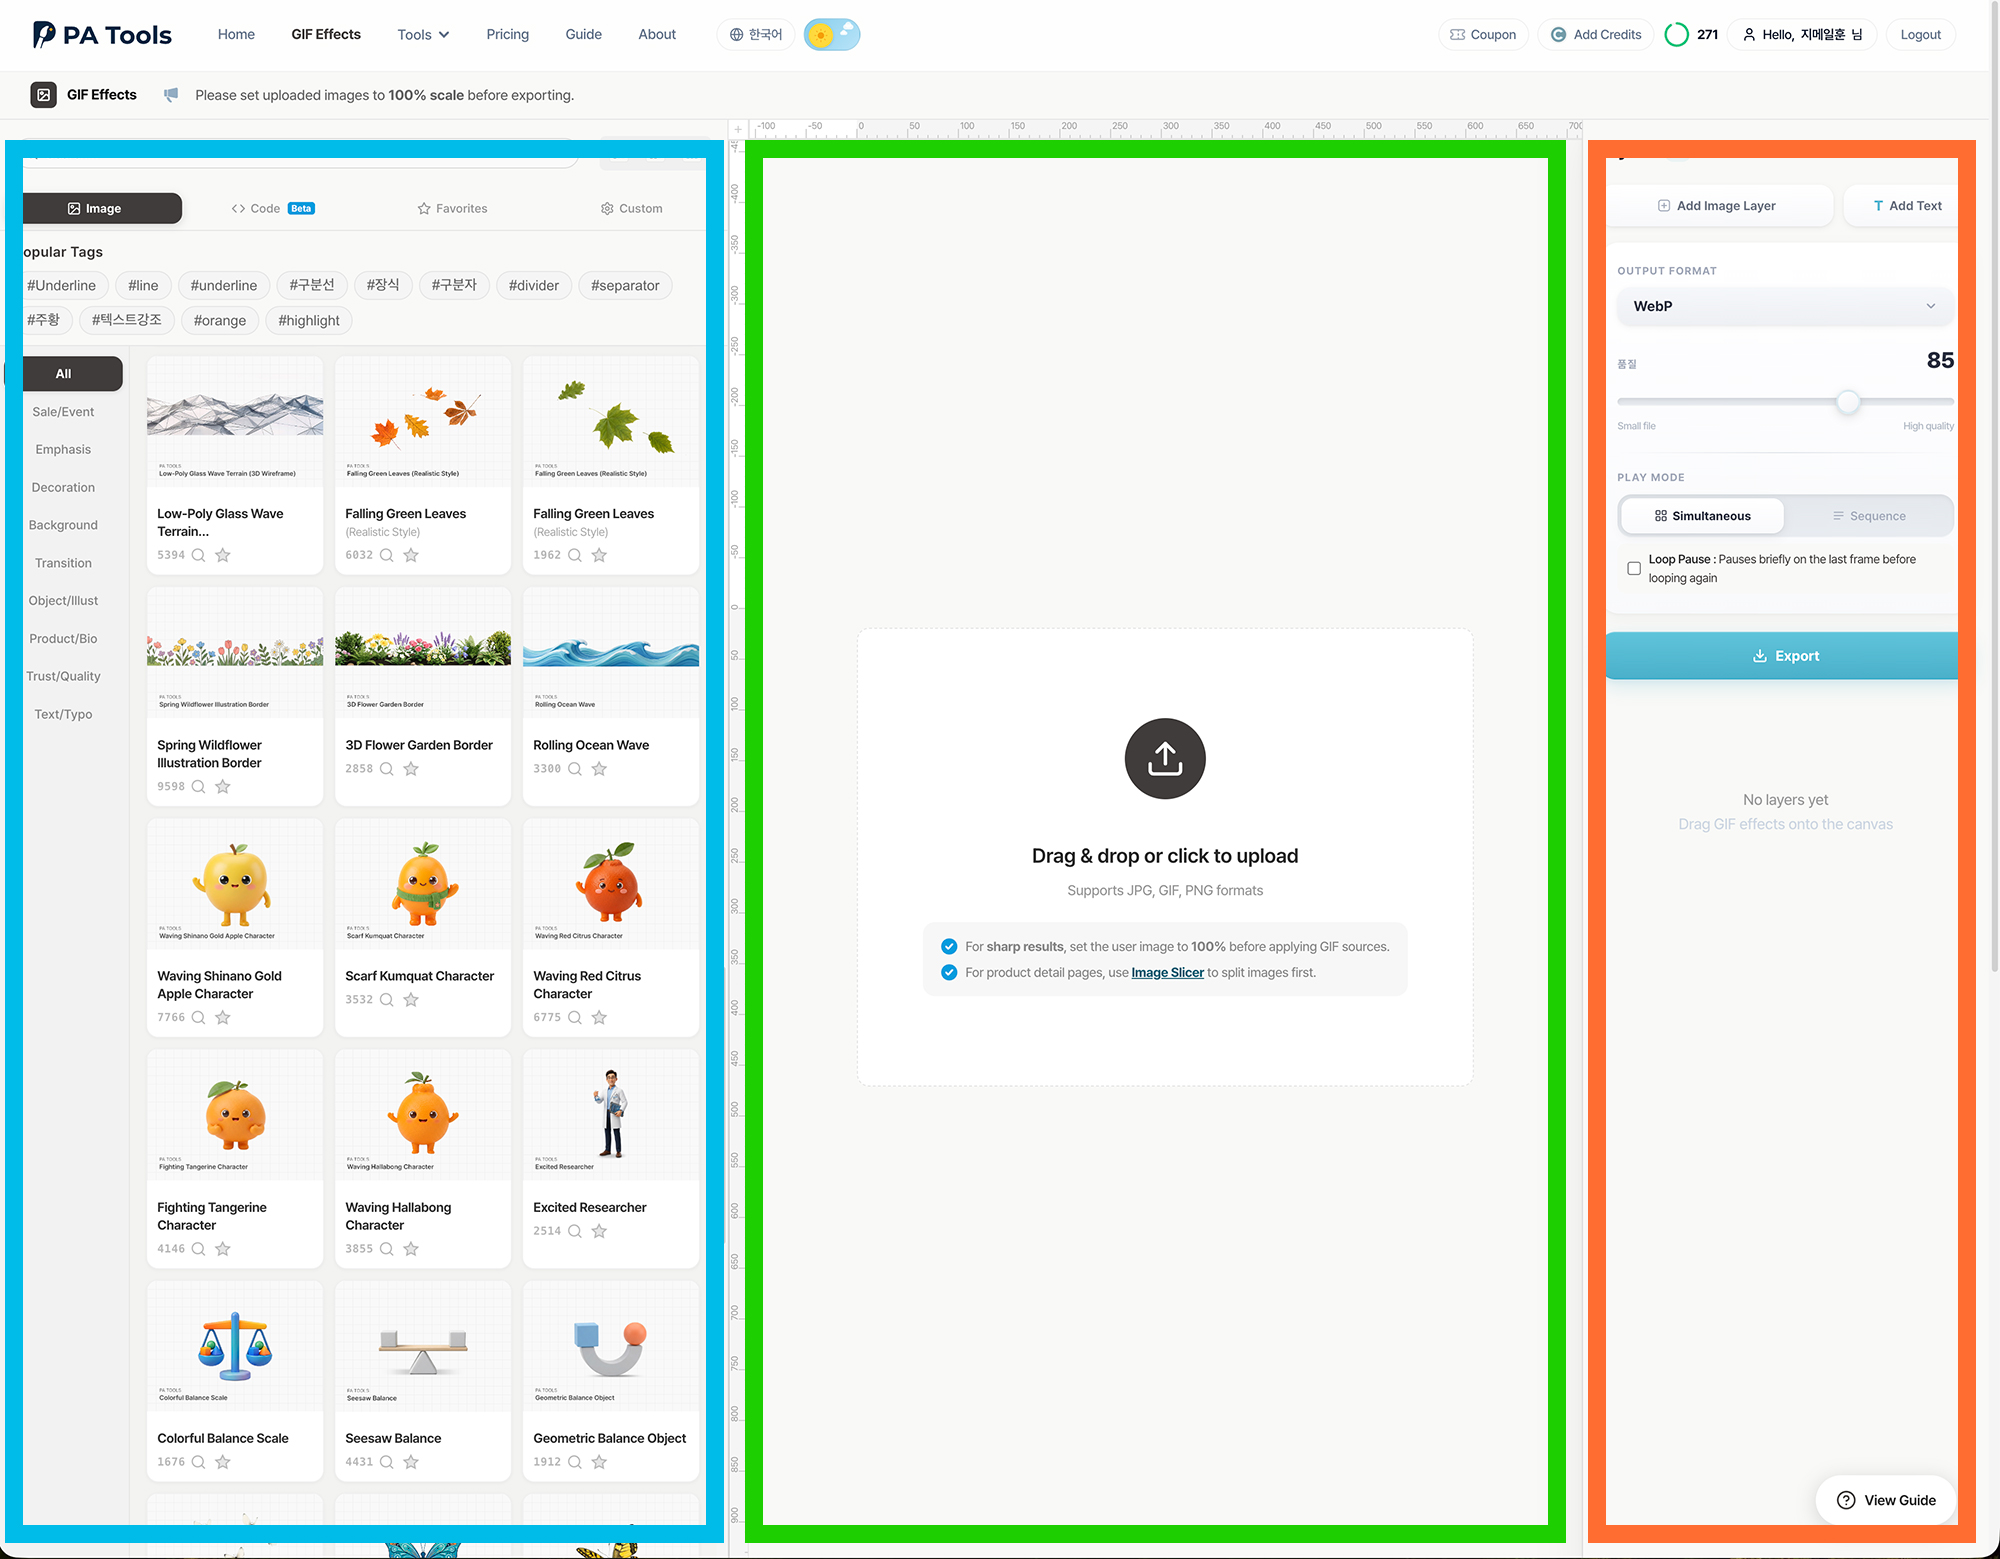
1. 화면 구성 알아보기
GIF 에디터 화면은 크게 3개 영역으로 나뉘어요. 각 영역의 역할을 알아볼까요?
2. 기본 사용법 — 따라하기
처음 사용하는 분도 쉽게 따라할 수 있도록 하나씩 알려드릴게요!
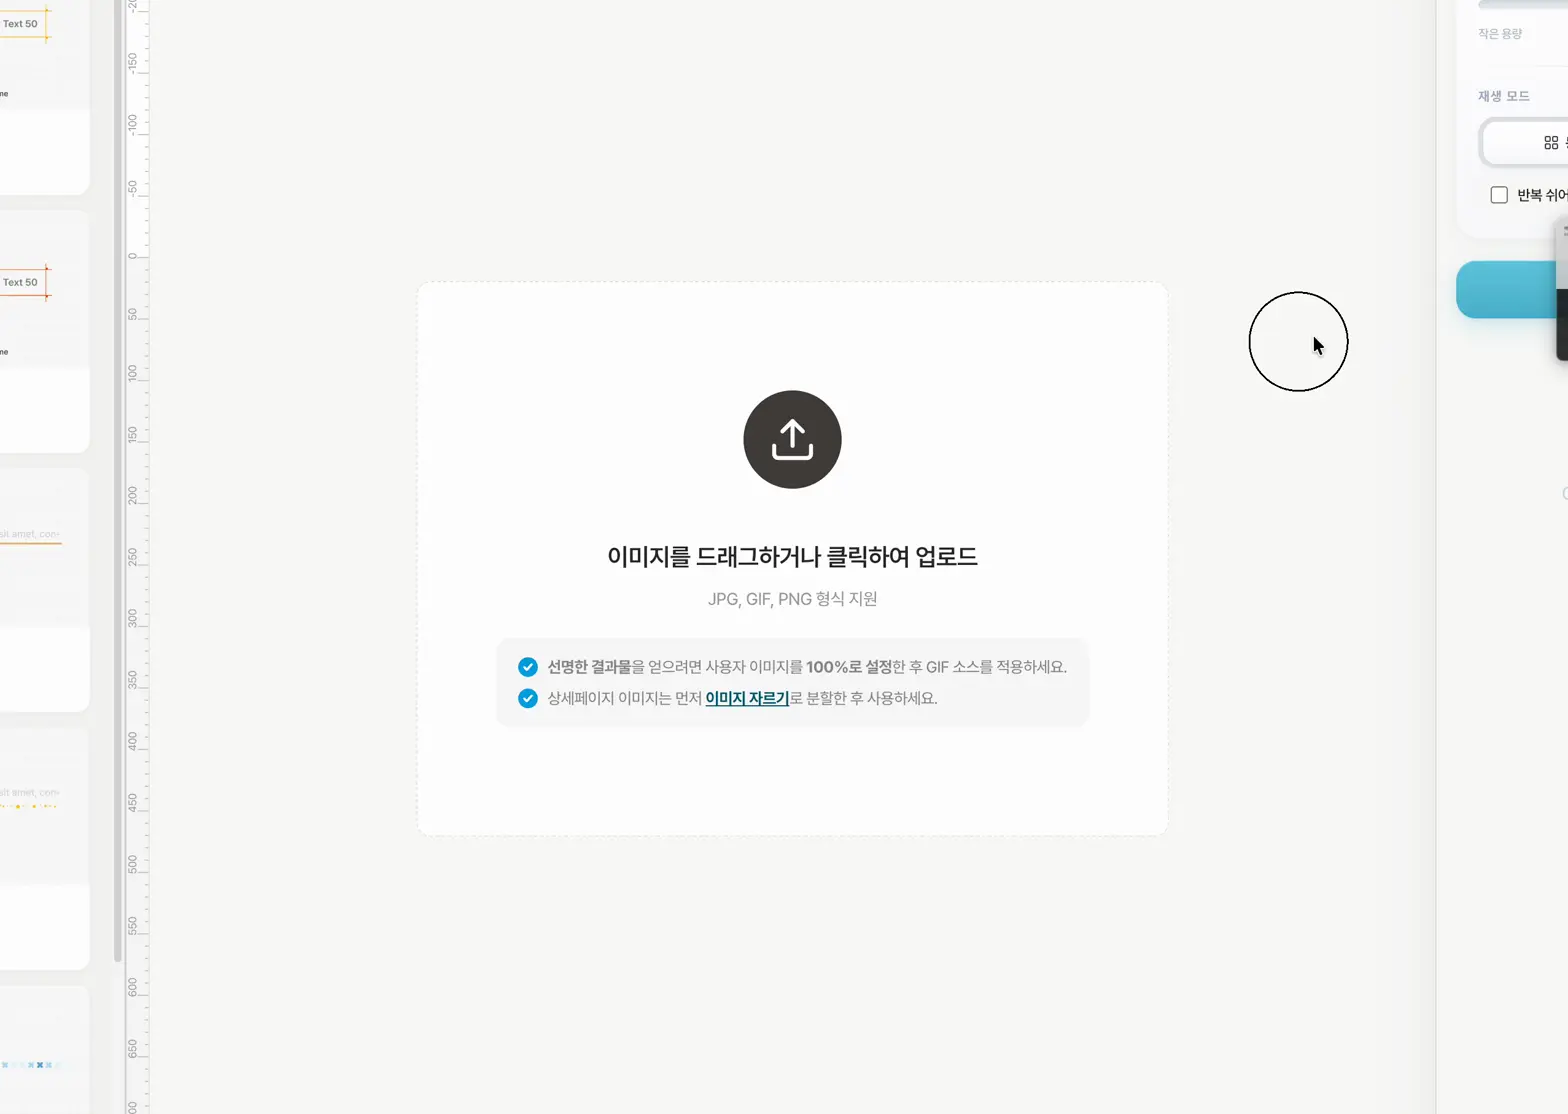
화면 가운데 점선 박스를 클릭하거나, 컴퓨터에서 이미지 파일을 끌어다 놓으세요 (드래그 앤 드롭). JPG, PNG, GIF 파일을 올릴 수 있어요. 파일 크기는 최대 50MB까지 가능해요.
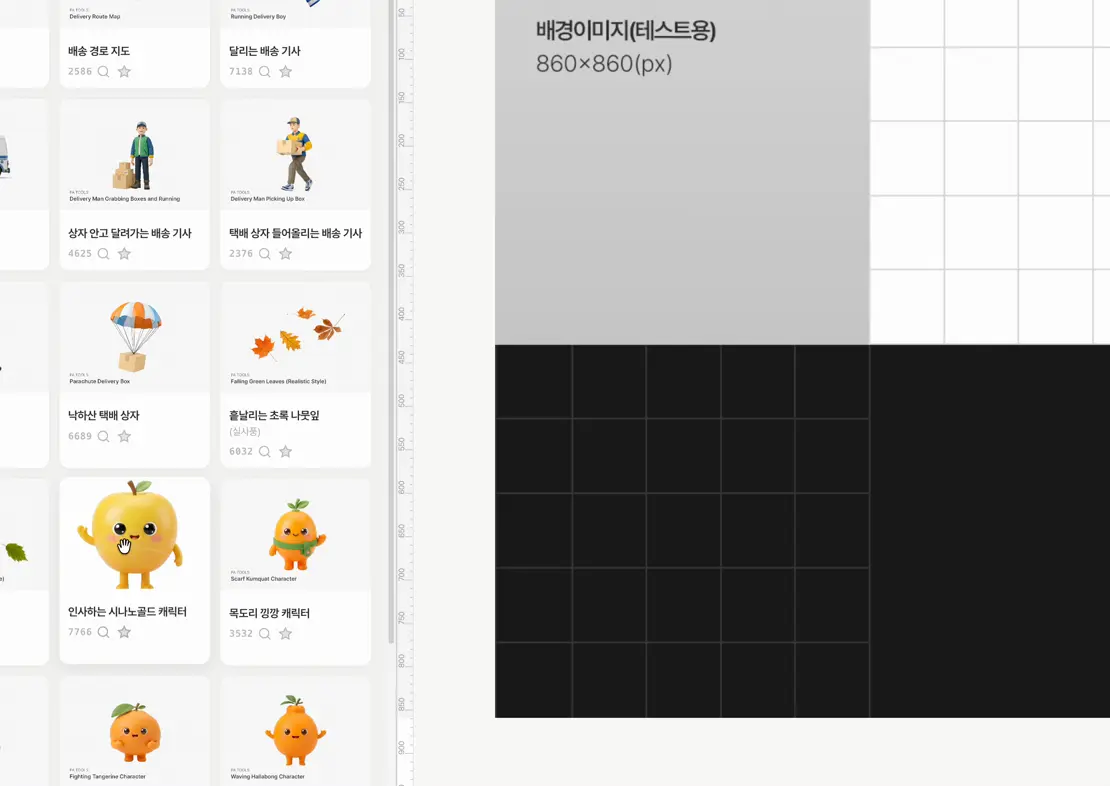
왼쪽 패널에서 마음에 드는 효과를 찾아 클릭하면 캔버스 위에 효과가 올라가요. 효과를 직접 캔버스 위로 끌어다 놓을 수도 있어요(드래그). 원하는 위치에 정확하게 놓을 수 있어서 편해요!
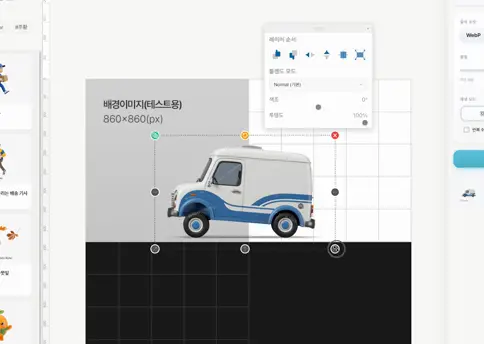
캔버스 위의 효과를 마우스로 끌어서 원하는 위치로 옮겨 보세요. 효과 주위에 생기는 작은 네모(핸들)를 잡고 끌면 크기도 바꿀 수 있어요. 위에 있는 둥근 핸들을 돌리면 회전도 돼요!
오른쪽 패널에서 원하는 포맷(WebP, GIF, MP4, APNG)을 선택하고, 아래쪽 파란 '내보내기' 버튼을 눌러요. 잠시 기다리면 파일이 자동으로 다운로드돼요!
3. 효과 찾기
왼쪽 패널에는 수백 가지 효과가 들어 있어요. 원하는 효과를 빠르게 찾는 방법을 알아볼까요?
카테고리별 탐색
왼쪽 패널 위쪽에 '버튼', '화살표', '반짝임' 같은 카테고리 버튼이 있어요. 클릭하면 해당 종류의 효과만 모아서 보여줘요. '인기' 태그를 누르면 가장 많이 쓰이는 효과를 볼 수 있어요.
검색하기
왼쪽 위 검색창에 키워드를 입력하면 실시간으로 검색돼요. 한글 키보드로 입력해도 자동으로 영어로 바꿔서 검색해줘요! (예: 한글 'ㅁ'을 입력하면 자동으로 'a'로 바꿔줘요.)
GIF 코드로 찾기
각 효과마다 고유한 4자리 코드가 있어요. 코드를 알고 있으면 검색창에 입력해서 바로 찾을 수 있어요. 코드 이펙트는 'C' + 3자리 숫자(예: C001)로 검색해요.
4개의 탭
- 프리셋 — 미리 만들어진 GIF 효과를 둘러봐요
- 코드 — 반짝임, 불꽃, 글리치 같은 57종 이상의 코드 이펙트를 사용해요
- 즐겨찾기 — 자주 쓰는 효과에 별을 눌러 저장해두면 여기서 빠르게 꺼내요
- 맞춤 소스 — 내가 직접 올린 GIF를 사용해요
패널 크기 바꾸기
왼쪽 패널 오른쪽 위에 있는 작은 버튼으로 패널 크기를 바꿀 수 있어요. 1단(좁게), 2단(보통), 3단(넓게) 중에서 골라요.
미리보기
효과 카드 위에 있는 돋보기 버튼을 누르면 효과를 크게 미리 볼 수 있어요.
4. 레이어 관리하기
'레이어'란 겹겹이 쌓인 투명한 종이 같은 거예요. 배경 이미지 위에 효과를 여러 개 올릴 수 있고, 각각 따로 움직이거나 설정할 수 있어요.
레이어 세부 설정
레이어를 클릭하면 아래와 같은 설정을 할 수 있어요:
- 투명도 조절 — 슬라이더로 효과를 투명하게 / 진하게 만들어요 (0~100%)
- 좌우/상하 반전 — 효과를 거울처럼 뒤집어요
- 가운데 정렬 — 효과를 캔버스 한가운데로 보내요
- 캔버스에 맞추기 — 효과를 캔버스 크기에 딱 맞게 늘려요
- 블렌드 모드 — 효과가 배경과 섞이는 방식을 바꿔요 (Multiply, Screen 등)
- 색조(Hue) 조절 — 효과의 색감을 바꿔요
- 크기 직접 입력 — 레이어 패널에서 너비x높이 숫자를 직접 수정할 수 있어요
- 위치 조절 — X, Y 좌표를 숫자로 입력해서 정확한 위치에 놓을 수 있어요
5. 텍스트(글자) 넣기
이미지 위에 예쁜 글자도 넣을 수 있어요!
오른쪽 패널 위의 'T 텍스트 추가' 버튼을 클릭해요.
팝업 창이 뜨면 원하는 글자를 입력하고, 글꼴(폰트), 크기, 색상을 골라요. 글자 테두리(외곽선)와 그림자도 넣을 수 있어요!
캔버스에 추가된 글자를 마우스로 끌어서 원하는 곳에 놓으세요. 크기 조절과 회전도 돼요.
텍스트 편집 팁
- 캔버스 위의 글자를 더블클릭하면 바로 편집 창이 열려요.
- 레이어 패널에서 연필 아이콘을 눌러도 편집할 수 있어요.
6. 코드 이펙트 (57종+)
코드 이펙트는 프로그래밍으로 만든 특별한 효과예요. 반짝임, 불꽃, 눈 내리기 등 57가지 이상의 효과를 색상, 크기, 속도까지 자유롭게 바꿀 수 있어요!
코드 이펙트 종류
- 파티클 — 반짝임, 색종이, 불꽃, 하트, 눈, 비, 거품, 유성, 벚꽃, 나비 등
- 빛/에너지 — 빛줄기, 물결, 글로우, 샤인, 오로라, 번개 등
- 시각 효과 — 보케, 매트릭스, 만화경, 모자이크, 물결 파동 등
- 텍스트 — 타이핑, 카운트다운, 텍스트 글로우, 스크롤 텍스트 등
- 전환 — 와이프, 셔터, 원형 와이프, 디졸브 등
- 프레임 — 네온 프레임, 체크마크, 밑줄 스윕, 원형 강조 등
- 레트로 — 글리치, VHS, 스캔라인 등
사용 방법
왼쪽 패널에서 '코드' 탭을 선택하면 모든 코드 이펙트를 볼 수 있어요. 효과를 클릭하면 캔버스에 추가되고, 레이어 카드에서 색상, 크기, 속도 등을 바꿀 수 있어요.
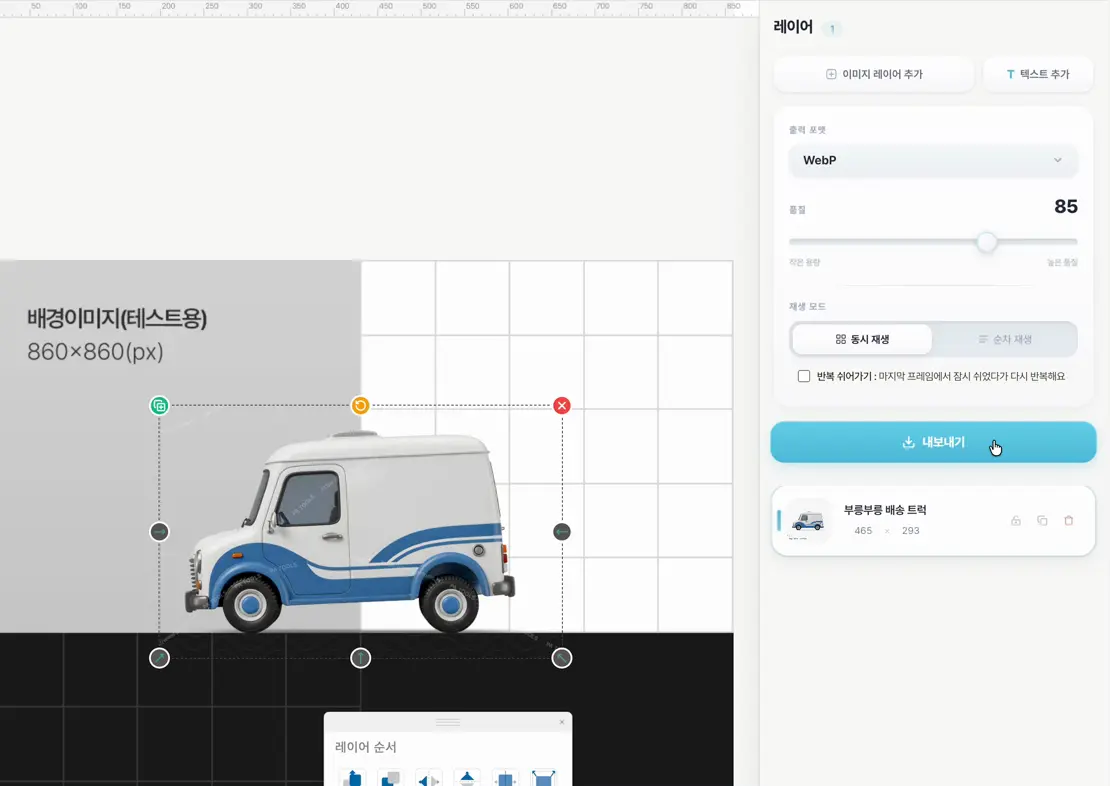
7. 재생 모드
효과가 여러 개일 때, 동시에 다 보일지 하나씩 차례대로 나올지 정할 수 있어요.
추가 옵션
- 루프 홀드 (쉬어가기) — 마지막 장면에서 잠깐 멈춘 뒤 다시 반복해요. 멈추는 시간은 0.5초~5초까지 조절할 수 있어요.
- 누적 모드 — 순차재생에서 이전 효과가 사라지지 않고 화면에 남아있어요.
8. 내보내기 — 포맷과 품질
만든 작품을 파일로 저장할 때, 4가지 포맷 중에서 고를 수 있어요.
품질 설정
- WebP 품질 — 슬라이더를 왼쪽으로 밀면 파일이 작아지고, 오른쪽으로 밀면 화질이 좋아져요. (기본: 85)
- MP4 품질 — 숫자가 낮을수록 화질이 좋고, 높을수록 파일이 작아요. (기본: 23)
크레딧
내보내기 할 때마다 크레딧이 사용돼요. 일반 효과는 1크레딧, 프리미엄 효과(금색 PREMIUM 표시)가 포함되면 2크레딧이에요. 같은 프로젝트를 다시 내보내기 하면 추가 크레딧이 들지 않아요!
9. 키보드 단축키
마우스 없이 키보드로도 빠르게 조작할 수 있어요! 자주 쓰는 단축키를 알아두면 작업이 훨씬 빨라져요.
| 단축키 | 하는 일 |
|---|---|
| Ctrl + Z | 실행 취소 (방금 한 걸 되돌리기) |
| Ctrl + Shift + Z | 다시 실행 (되돌린 걸 다시 하기) |
| Ctrl + S | 내보내기 (저장하기) |
| Delete 또는 Backspace | 선택한 레이어 삭제하기 |
| ← → ↑ ↓ | 선택한 레이어를 1픽셀씩 이동 |
| Shift + 방향키 | 선택한 레이어를 10픽셀씩 이동 (빠른 이동) |
| Escape | 선택 해제하기 |
Mac 사용자
- Ctrl 대신 Cmd(⌘) 를 사용하세요.
10. 알아두면 좋은 꿀팁
꿀팁 모음
- 효과를 왼쪽 패널에서 캔버스로 드래그하면 원하는 위치에 정확하게 놓을 수 있어요.
- Shift + 방향키를 누르면 한 번에 10픽셀씩 빠르게 이동해요.
- 텍스트 레이어를 더블클릭하면 바로 편집 창이 열려요.
- 한글 키보드 상태에서 검색해도 자동으로 영어로 변환해서 검색해줘요.
- 같은 프로젝트를 다시 내보내기 하면 크레딧이 추가로 들지 않아요.
- 웹용 이미지는 WebP 포맷이 파일 크기도 작고 화질도 좋아서 추천해요.
- 효과가 흔들리거나 이상하면, Ctrl+Z로 바로 되돌릴 수 있어요. (최대 30번까지!)
- 레이어를 잠그면 실수로 건드리지 않아서 안전해요.
- 줌(확대/축소) 기능으로 세밀한 위치 조정을 해 보세요. (10%~300%)
- 브라우저는 Chrome을 추천해요. Safari에서는 일부 기능이 제한될 수 있어요.
Text on Image
Add animated text to create stunning images!
What is this?
Follow along (It's easy!)
Click the "Background Image" section to select a photo. Choose a product or background image!
Enter text in the "Text" section. Try "50% OFF!", "New Arrival!". Click "Add Text Layer" to display it!
Customize in the left panel:
- Font: 15+ fonts from cute to bold!
- Size: Make text bigger or smaller
- Color: Change to any color
- Outline/Shadow: Add effects for visibility
Select how your text moves in the "Animation" section!
- Fade: Gradually appears
- Slide Up/Down: Slide effect
- Bounce: Bouncy effect
- Typewriter: Types one letter at a time
- And over 25 more effects!
Drag text with your mouse on the canvas to move it. Grab circles on the border to resize!
Click "Save as WebP" or "Save as GIF"! Use it on social media, online stores, and more.
Good to know
- Multiple texts: Add multiple text layers for various elements
- Preview: Check animation before saving with the preview button
- Layer Panel: Select or delete text layers in the right panel
- WebP is better!: Smaller file size and better quality than GIF
- Safari browser: This tool works best on Chrome, Firefox, and Edge
Screen layout
Text on Video
Add beautiful captions and text to your videos!
What is this?
Follow along (It's easy!)
Click "Background Video" to select a video. Supports MP4, MOV, AVI!
Enter text in the "Text" section. Try "Subscribe!", "Today's Vlog". Click "Add Text Layer" to display!
Customize in the left panel:
- Font: 15+ fonts from cute to bold!
- Size: Make text bigger or smaller
- Color: Change to any color
- Bold/Italic: Change text style
- Outline/Shadow: Add effects for visibility
Select how your text moves in the "Animation" section!
- Counter: Numbers counting up
- Fade: Gradually appears
- Slide Up/Down: Slide effect
- Bounce: Bouncy effect
- Typewriter: Types one letter at a time
- And over 25 more effects!
Drag text with your mouse on the canvas. Grab circles on the border to resize!
Click "Save as WebM" or "Save as MP4"! Upload to YouTube, Instagram, TikTok.
Good to know
- Multiple texts: Add multiple text layers
- Preview: Check how the video looks before saving
- Layer Panel: Select or delete text layers
- No Safari: Use Chrome, Firefox, or Edge
- Video formats: Supports MP4, MOV, AVI
Screen layout
Image Resizing
Easily resize your images!
What is this?
Follow along (It's easy!)
Click "Click or drag images here" to select photos. Multiple images at once!
Enter desired width and height. Check "Maintain Ratio" to prevent distortion!
Change file format if desired:
- Keep Original: Keep current format
- PNG: For transparent backgrounds
- JPG: Most common format
- WebP: Small size, great quality
- GIF: Animated images
Move the quality slider. 100 = best quality, lower = smaller file.
Click "Convert" to resize. Wait a moment!
Click "Download" to save. Multiple images as a ZIP file!
Good to know
- Batch processing: Select multiple photos to resize all at once
- Animations too: Resize GIF and WebP animations
- Maintain Ratio: Prevents image distortion
- Safe & Private: All processing on your computer
- Under 10MB: File size must be under 10MB
Color Palette
Extract beautiful colors from images!
What is this?
Follow along (It's easy!)
Two ways to start:
- Preset Palettes: Click a pre-made combination
- Custom Pick: Use the color picker
For more precise control:
- RGB Sliders: Adjust Red, Green, Blue
- HEX Code: Enter a color code (e.g. #FF5733)
Customize your palette:
- Algorithm: Tailwind, Material Design, etc.
- Shade Count: 5 to 24 shades
- Contrast Shift: Adjust brightness contrast
Click "Generate Palette" to create shades from light to dark!
Click any color to copy its code. Paste anywhere to use!
Get codes in various formats:
- CSS: Ready for websites
- Tailwind: For Tailwind CSS
- HEX, RGBA, HSL: Various formats
- PNG Download: Save as image
Good to know
- Use presets: Start with preset palettes
- Click to copy: Click any color to copy
- Contrast check: WCAG contrast checker
- Multiple formats: CSS, Tailwind, HEX, RGBA, HSL, OKLCH
- Save as PNG: Save palette as image
Quote Generator
Create professional quotes quickly!
What is this?
Follow along (It's easy!)
In the left panel, enter company name, representative, address, phone in "Business Info". Upload your logo too!
Enter client company name and contact in "Recipient Info".
Add products/services in "Items":
- Item Name: Product or service
- Quantity: How many
- Unit Price: Price per unit
- Amount: Auto-calculated!
Apply discounts or set tax:
- Discount: By amount or percentage
- Tax: Separate, included, or exempt
Click "Notes" to add payment terms, validity period. Choose from templates or write your own!
Check the preview, then click "Download PDF" or "Download Image"!
Good to know
- Auto-save: Your input is saved automatically
- Save profiles: Save business info for quick loading
- Live preview: See your quote in real-time
- Seal/Signature: Upload stamp or signature for official look
- Quote terms: Set validity, payment method, etc.
Screen layout
Video Trimmer
Cut only the parts you need from your videos!
What is this?
Follow along (It's easy!)
Click or drag and drop a video file. Supports MP4, MOV, AVI, WebM!
Two ways to set the clip range:
Quickly select common ranges:
Press play to verify the selected range is correct!
Click "Extract" to cut the selected portion. Then click "Download" to save!
Good to know
- 0.1s precision: Trim with 0.1-second accuracy
- Original quality: Extract without quality loss
- Save presets: Save frequently used range settings
- Large files: Handle videos up to 2GB
- Multiple formats: Supports MP4, MOV, AVI, WebM
GIF to WebP
Convert GIF to lighter and clearer WebP format!
What is this?
Follow along (It's easy!)
Drag and drop or click to select a GIF file.
Adjust quality and size if needed. Default settings work great!
Click "Convert" to transform GIF to WebP. Wait a moment!
Click "Download" to save the WebP file.
Good to know
- Size reduction: WebP can be up to 50%+ smaller than GIF
- Quality preserved: Virtually no visible difference
- Browser support: All modern browsers support WebP
- Transparency: Transparent backgrounds are preserved
- Batch convert: Convert multiple GIFs at once
Video to WebP
Convert videos to lightweight WebP animations!
What is this?
Follow along (It's easy!)
Drag and drop or click to select. Supports MP4, MOV, AVI.
Select the portion you want. Set start/end times.
Adjust output size and quality. Configure FPS too.
Click "Convert" to transform video to WebP.
Click "Download" to save.
Good to know
- Short videos work best: Under 10 seconds recommended
- File size: Much smaller than GIF
- Quality slider: Balance quality and file size
- FPS setting: Lower FPS = smaller file
- Browser processing: Files are not uploaded to servers
Video to GIF
Convert videos to animated GIF format!
What is this?
Follow along (It's easy!)
Drag and drop or click to select a video file.
Set start/end time for the portion you want as GIF.
Adjust GIF size, FPS, and quality as desired.
Click "Convert" to create the GIF.
Click "Download" to save.
Good to know
- Keep it short: 3-5 seconds is ideal for sharing
- Reduce size: Smaller width = much smaller file
- FPS: 10-15 FPS works well
- Loop forever: Creates infinite loop GIFs by default
- Try WebP too: For even smaller files, try WebP conversion
Image to PDF
Convert multiple images into a single PDF!
What is this?
Follow along (It's easy!)
Drag and drop or click to select images. Upload multiple at once!
Drag images to reorder. Arrange in the order you want in the PDF.
Set paper size, orientation, margins as desired.
Click "Create PDF" to combine images into one PDF.
Click "Download" to save the finished PDF.
Good to know
- Reorder: Drag images to arrange in desired order
- Multiple per page: Place 1-9 images per page
- Paper size: Choose A4, Letter, and more
- Rotate: Rotate images 90 degrees
- Safe: Processed in browser, files are not sent to servers
Case Converter
Easily convert text case!
What is this?
Follow along (It's easy!)
Type or paste text in the left text area.
Click the desired format: UPPER CASE, lower case, Title Case, Sentence case, etc.
Converted text appears on the right. Click "Copy" to copy!
Character count, whitespace removal, and more.
Good to know
- Real-time: Results appear as you type
- Many formats: camelCase, PascalCase, snake_case for programmers
- Character count: Auto-counts characters and words
- One-click copy: Copy results to clipboard instantly
- Korean too: Some features work with Korean text
Symbol Copy
Click and copy special symbols!
What is this?
Follow along (It's easy!)
Select a category: Emojis, Arrows, Math, Shapes, Currency, etc.
Click any symbol to auto-copy. Paste anywhere you need it!
Enter keywords in the search bar to find symbols quickly.
Good to know
- Click to copy: Symbols are copied to clipboard instantly
- Search: Find symbols by keyword
- Recent: Recently copied symbols shown at top
- Many categories: Emojis, arrows, math, shapes, currency, special chars
- Use anywhere: Paste in messaging apps, documents, and more
Media File Analyzer
View detailed file information!
What is this?
Follow along (It's easy!)
Drag and drop or click to select an image or video file.
Details appear automatically: size, resolution, format, duration, etc.
For videos, see codec, bitrate, FPS and more.
Copy any info you need for use elsewhere.
Good to know
- Many formats: Supports JPG, PNG, GIF, WebP, MP4, MOV, AVI
- Auto analysis: Results appear instantly on upload
- Video info: Codec, bitrate, FPS, audio details
- Image info: Resolution, color mode, file size
- Safe: Only reads file info, nothing is stored
Screen layout
Video Frame Extractor
Save specific scenes from videos as images!
What is this?
Follow along (It's easy!)
Drag and drop or click to select a video file.
Select: capture specific moment or auto-extract at intervals
Set output format (JPG, PNG, WebP), quality, and size.
Click "Extract" to capture frames from the video.
Download individual frames or all as a ZIP file.
Good to know
- Auto-extract: Extract frames at regular intervals
- Multiple formats: Choose JPG, PNG, or WebP output
- Quality control: Set output image quality as desired
- Batch download: Download all frames as ZIP
- Safe: All processing happens in your browser
Screen layout
Frequently Asked Questions
Some tools are available for free, but premium tools like the GIF Effects Editor and Text Animator require login. We also offer a free trial—try it first!
Yes! Most processing happens directly in your browser. Uploaded files are deleted immediately after processing and are not stored on our servers.
Basic tools are free. Premium features start at ₩7,900/month with monthly credits. Check the pricing page for details.
Contact us via the email at the bottom of the page. We'll respond within 24 hours.